Intro
The Trip Editor should not be considered a
full-blown trip planner tool. It can not, and probably never
will, calculate a route. The trip file format has not been
decoded enough, TripManager does not know anything about
routing algorithms in general and more importantly used on the
Zumo.
What it can do:
· Review the results of a calculated trip, and make minor
modifications.
· Change general parameters. Trip name, Routing preferences,
Transport method and Departure date.
· Add, or Delete a route point.
· Move a route point to a new location.
· Reorder the route points.
· Create a new empty trip. Add route points from map
coordinates.
· Lookup address information for selected route points and
save that in the Address field. That info will also be
available in the Trip planner on the Zumo XT(2)(3). Note that
the route planner on the XT2/XT3 will only show addresses for
Via points.
· Import/Export route points from/to GPX/CSV files.
· Import can read Via and Shaping points from a route in the
GPX, or Way points. The GPX can be processed by Trk2Rt first to
automatically add more shaping points.
· Export can create a GPX from a trip file, that you can
import in BC.
· The
Trip can be opened in Kurviger, for route planning.
· It
can read/write trip files in folders on your computer’s hard
drive, and on the Device Zumo XT(2)(3).
Note: Modifying a trip clears any existing
calculation result, and will make the Zumo recalculate the trip
next time it is opened.
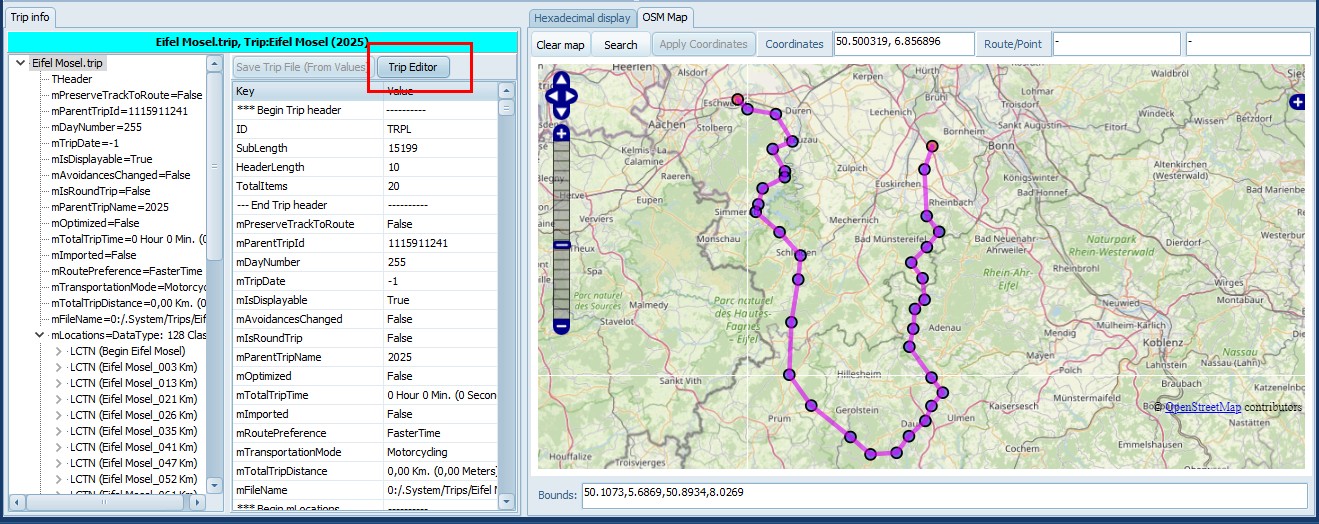
Editing an existing trip
· Open a trip, from your hard drive, or the device
· Click on Trip Editor, Edit
The Trip Editor opens up on the left, leaving
space for the map. Selecting a Route point will update the
map.
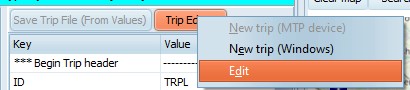
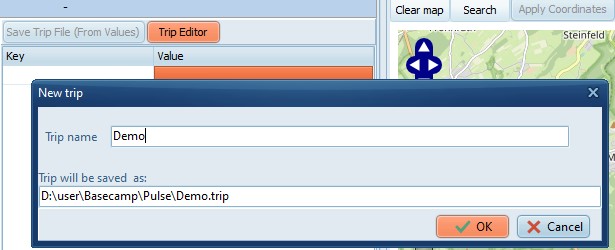
Creating a new trip
Choose either New trip (MTP device), or
New trip (Windows). A dialog opens where you need to
enter a Trip name and click on OK.
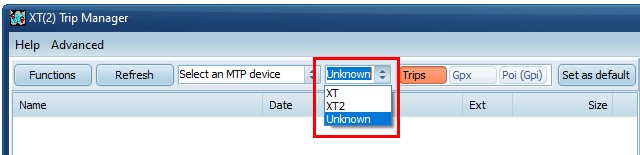
Notes:
· Make sure the selected model matches the model you want to
create the trip file for. XT, XT2 and XT3 trip files are not
compatible.
· MTP
device will normally be an XT(2)(3), but it is possible to use
any MTP device that allows storing files. Hence the term ‘MTP
device’ is used.
· New
trip (MTP device) is only enabled if an MTP device is
connected.
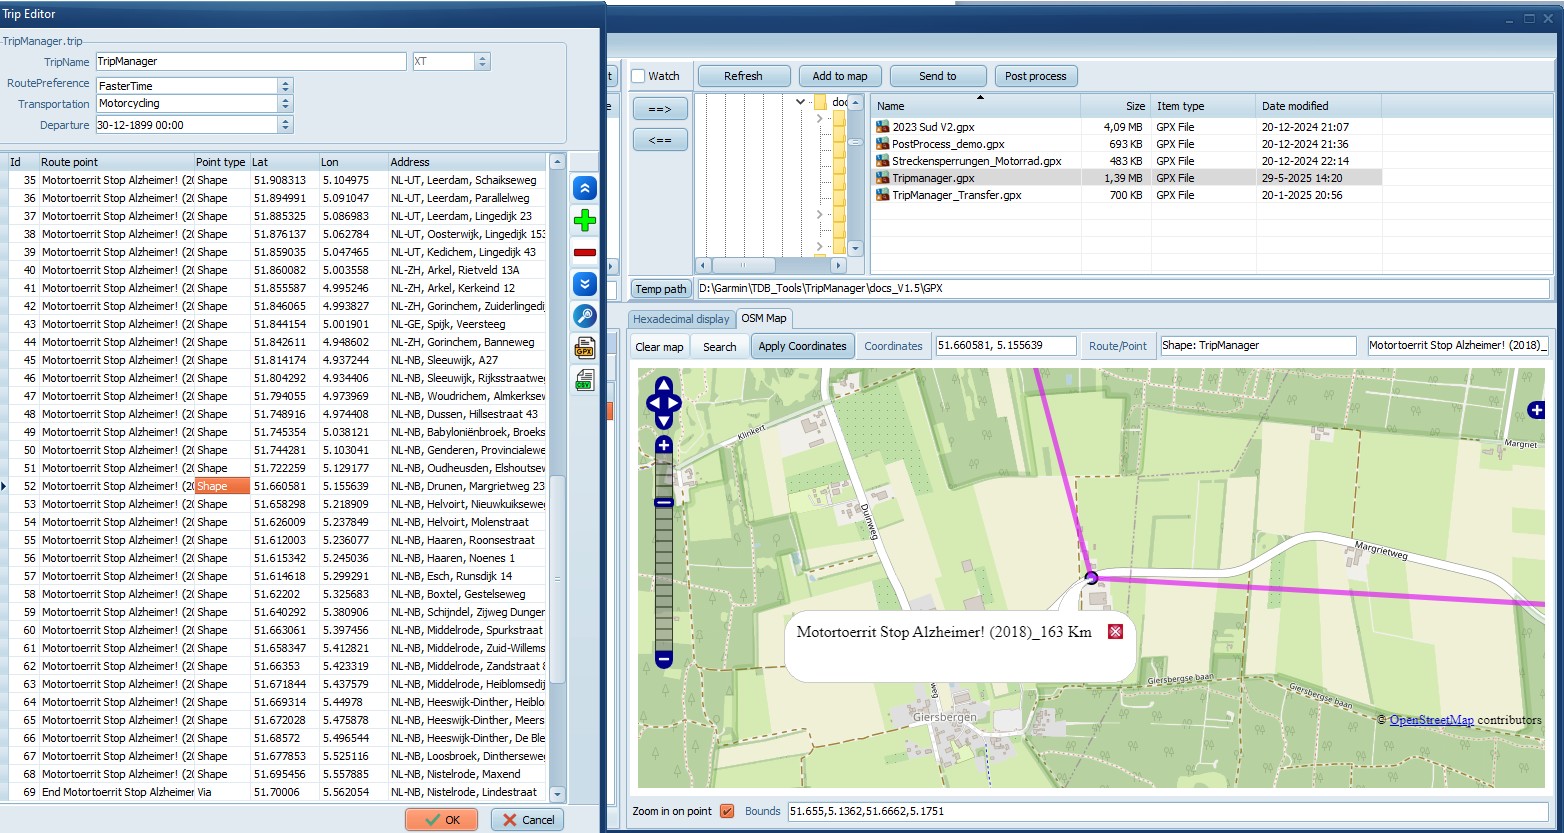
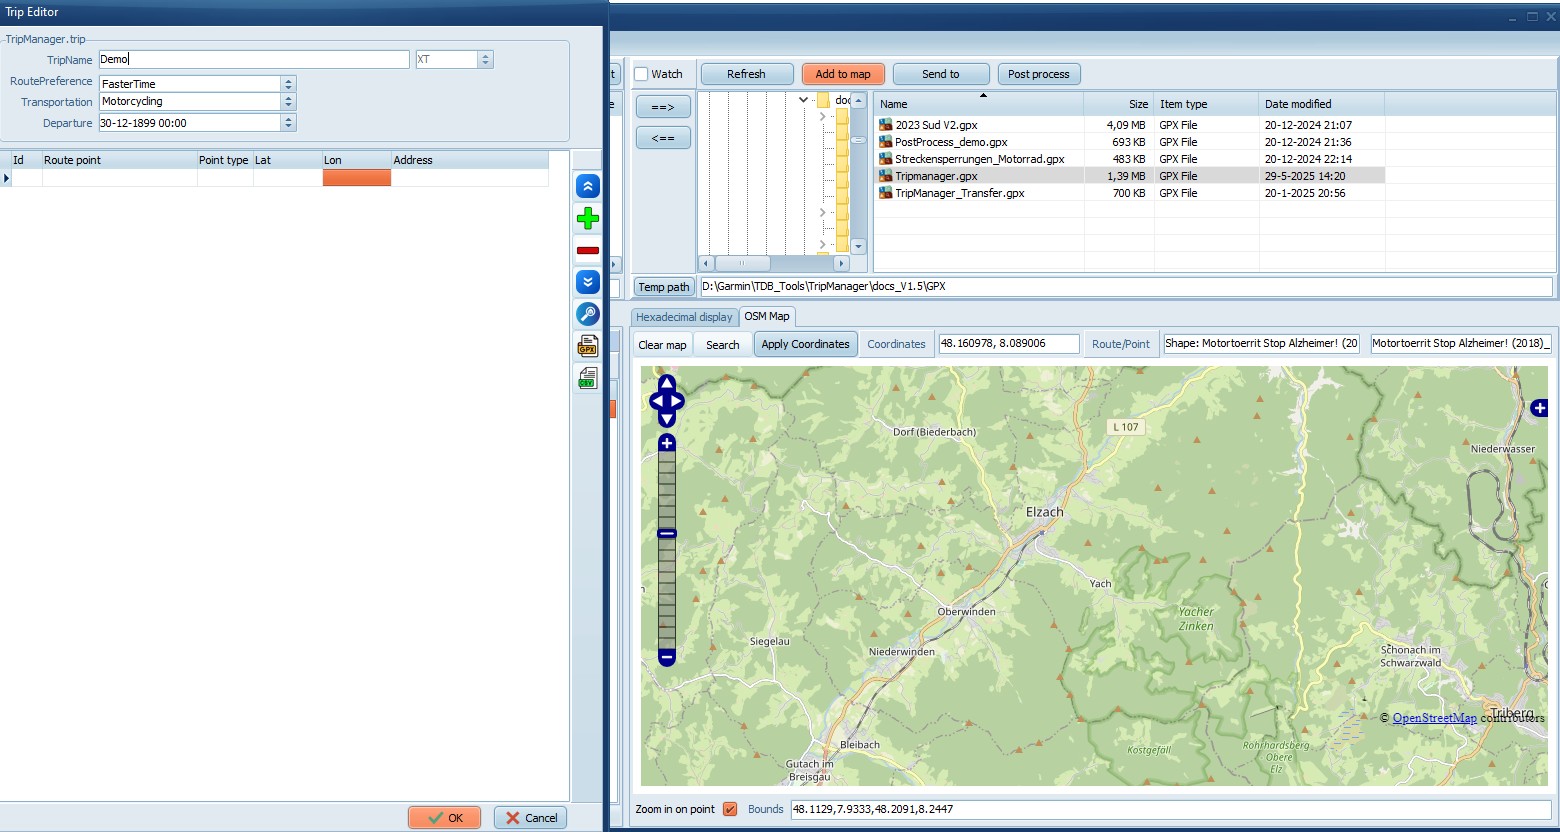
A blank Trip Editor window opens:
Trip editor controls
|
|
Edit boxes TripName, RoutePreference,
Transportation and Departure can be
edited.
The model (XT(2)(3)) is readonly,
the model of a trip file can only be specified when
creating .
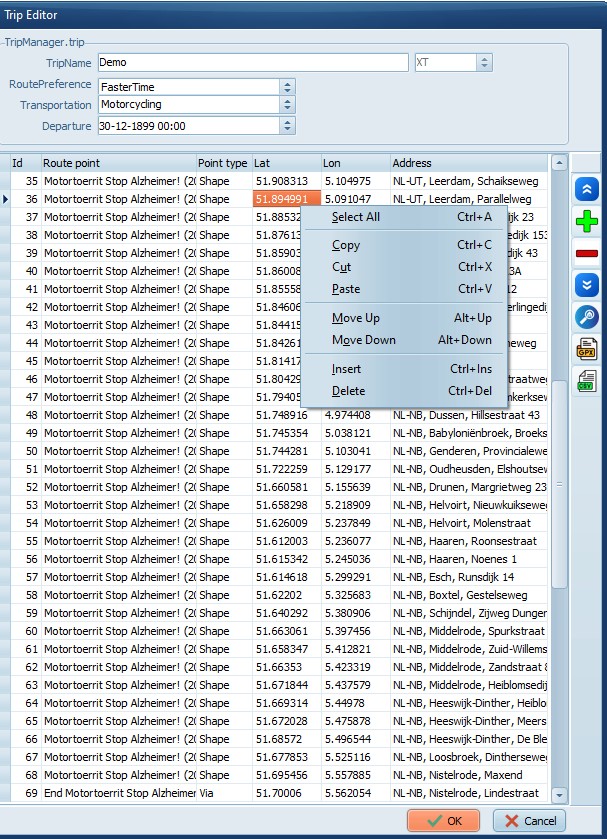
The Grid columns can be edited, except
for the ID, which is autoassigned.
Right Click brings up the context menu.
All functions are also accessible using keyboard
shortcuts.
The coloured buttons on the
right:
Move Up
Insert
Delete
Move down
Lookup address (if
configured)
GPX
Import
Trk2RT + Import
Export
CSV
Import
Export
Kurviger
Opens the trip in Kurviger
Clicking OK saves the trip file,
Cancel discards the changes.
You can use the clipboard to copy
from/to Excel. To avoid problems with the decimal format
in the GPS coordinates first set the format in Excel to
‘text’.
|
Common tasks
Change a route point:
· You
can change the name and address to something meaningful.
· Change from Shape to Via or vice
versa.
· To
change to GPS position you can overtype the Lat/Lon values, but
it is easier to use the button ‘Apply coordinates’ from the
map.
Delete a route point:
Ctrl+Del
Insert a route point:
Ctrl+Ins
· The
route point will get a default name: ‘RtePt’ + Id
· All
route points with default names will be renumbered when (other)
route points are inserted.
· The
route point will be set to Shape. When saving the trip
file, the first and last route point are automatically reset to
Via.
· The
route point will get the GPS coordinates from the currently
selected point on the map.
Moving a route point: Alt+Up, or
Alt+Down
Moving multiple route points:
· Mark the lines to move, using Shift + Cursor keys, or
Shift/Ctrl+Left mouse button.
· Cut
the lines to the clipboard, using Ctrl+X.
· Select the line where the route points should be moved to,
and Paste using Ctrl+V.
Deleting route points, looking up address and
copying/cutting to clipboard support multi-selection.
Adding route points using the Map.
· Locate the point you want to insert on the map.
· You
can use the Search button, or use Ctrl+Left mouse
button.
· Select the route point where the new point should be
inserted after.
· Click on the Plus button, or use
Ctrl+Ins.
Updating the Address
· Select the route points to update, or use CTRL+A to select
all route points
· Click on the Lookup Address button.
· The
requests will be throttled, meaning TripManager will issue no
more requests/second than specified.
Import route points from a GPX, or CSV
· Click on the GPX/CSV button, and choose Import. Open the
file.
· A
dialog will be shown with the Waypoints and Routes found in the
GPX. Check what to import.
· To
automatically add more shaping points use Trk2Rt + Import. More
shaping point will create a trip that matches the original
route closer.
· The
newly created route points will be added after any existing
route points.
Export route points to a GPX, or CSV
· Click on the GPX/CSV button, and choose Export.
· The
saved GPX contains only route points. In BC you will need to
recalculate.
· Click on the blue globe button.
GPX compatibility has been tested with BC,
Kurviger and MRA, but other software should also work.
When saving a trip file the calculation will
be cleared, to ensure that the next time the XT(2)(3) will
recalculate the trip. A MessageBox will appear to warn
you.
The map will reflect the changes made, and
connect the route points using straight magenta. lines.
You can turn on/off zooming in on a selected
route point using the checkbox Zoom in on point at the
bottom of the map.