1) Using Explore, Tread App or Basecamp. Not
covered here.
2) Send a track to the XT(2)(3). On the
XT(2)(3) convert the track to a trip.
· The
trip will not be altered while driving
· You
lose all your Via/Shaping points
3) Send a calculated route to the
XT(2)(3).
· Initially the trip will be the same on the XT(2)(3),
provided a few conditions are met, EG same Map, same
transportation mode etc.
· But
after a (forced) recalculation the trip can be very
different.
· You
do have Via/Shaping points.
4) Send a ‘stripped’ route to the XT(2)(3).
Only the Via/Shaping points are retained.
· The
trips will always be recalculated upon importing. This can be
considered a Con. Actually I believe it is a Pro. You can check
the result at your desk, and you will not be surprised while
driving.
5) TripManager allows you to send a .trip file
directly to the XT(2)(3). Additionally the trips:
· Don’t need to be imported. Directly available in the trip
planner
· Are
set to ‘saved’. Fixed for RUT.
· Route points retain their names.
· Routes within the same GPX are grouped. (XT only)
· Starting with TripManager V1.6 trips can be sent that
don’t need recalculation. (Only for BaseCamp calculated GPX
files)
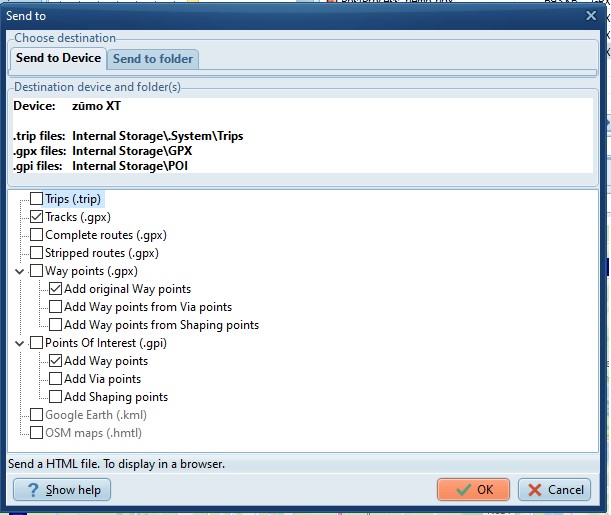
Methods 2 to 5 can be done using TripManager,
using the button Send to. Only a GPX file,
containing a calculated route, and optionally way
points, is needed. All other files (Tracks, Way points, POI,
Trip) will be generated as needed, and transferred to the
default locations on the Zumo. GPX files created by BaseCamp,
Kurviger and MRA (GPX 1.1 Route+Track) are tested, others may
also work.
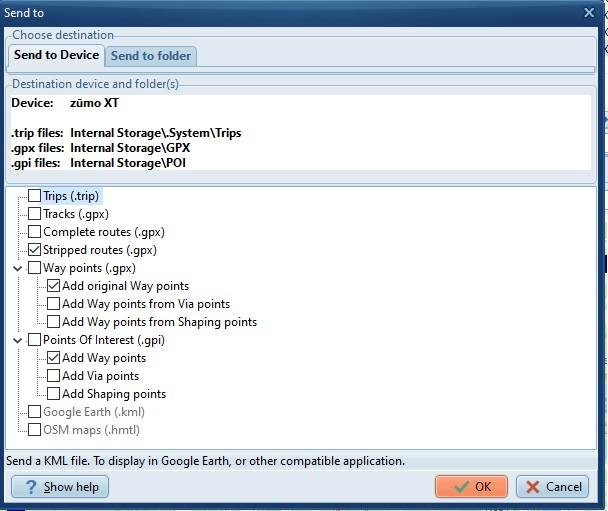
· Select the GPX file(s) to send to the device in the
Windows file list (Top Right).
· Open the Send to dialog by using the button Send
to.
· Choose the Tab Send to Device, to send to the
Device.
· Review the locations where the files should be stored on
the Zumo under the heading: Destination device and
folder(s).
· Review the model used XT, XT2, XT3 or Tread 2.
· Check the file types to send, by ticking the checkmark(s)
and click on OK.
Notes:
· Send to Device replaces the
button Transfer to Device, and Send to Folder
replaces the button Additional files from pre V1.5
versions.
· If
a device is connected TripManager will activate Send to
Device automatically.
· The
created files are the same regardless of the
destination.
· In
this screenshot trips will be saved on ‘Internal
Storage\.System\trips’ and tracks on ‘Internal
Storage\GPX’.
· The
default location where the files are stored depends on the
filetype. (Trips/GPX/GPI)
· For
trip files the only location known to work is ‘Internal
Storage\.System\Trips’.
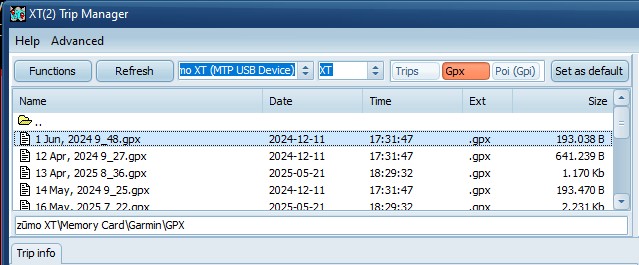
· If
you have a SD Card installed, you may want to change the
default location for GPX (or POI) to your SD Card. To change
the default location use this procedure:
· On
the Top-Left corner select the preset you want to change (GPX,
POI)
· Navigate to the SD Card folder. (zūmo XT\Memory
Card\Garmin\GPX)
· Click on Set as Default.
· For
clarity the samples shown below only use 1 method at a time.
But you can combine them. A combination I use often is ‘Trips’
and ‘Tracks’. The track is made visible on the map, and the
trip is used for driving.
· TripManager does not write to Current.Gpx, Temp.gpx etc.
when using this function. But after successful transfer, and or
import, you may find your routes there. This is a feature
provided by the Zumo.
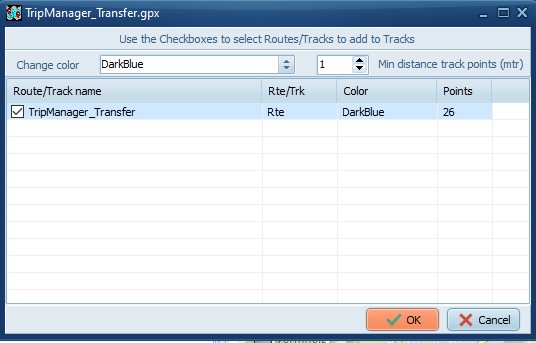
· If
Tracks need to be created, this dialog pops up where you can
(un)select individual tracks and change their color. To filter
the nr. of track points you can specify the minimum distance
between track points. Note: 1 mtr prevents duplicate track
points, while retaining detail.
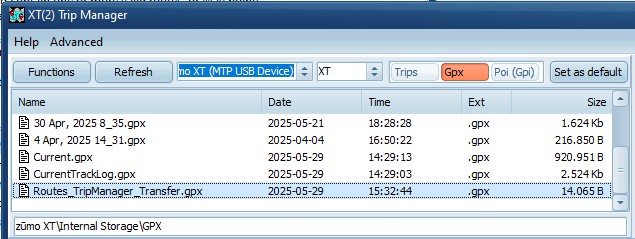
· Select the GPX file, Click on Send to Device.
· Tick only Tracks (.gpx) and click on OK.
· Select your routes/tracks in the dialog that pops
up.
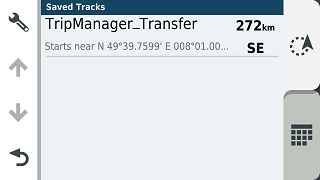
· A
file should appear on the Zumo on the GPX preset.
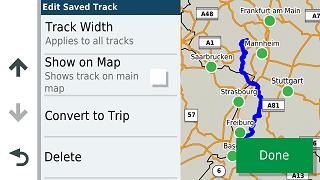
On the Zumo the track will be available in
Apps/Tracks.
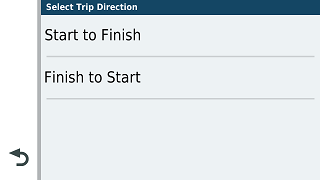
· Open the track and click on ‘Convert to Trip’
· Select ‘Start to Finish’. (Or Finish to Start if you
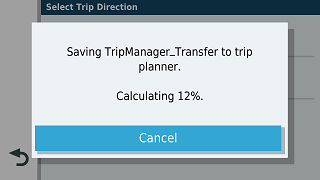
like)
‘Saving to Trip planner’ appears.
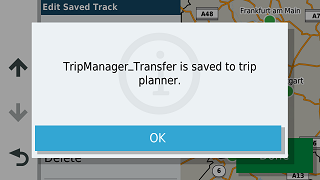
Upon completion the trip is available in the
Trip Planner. (Under Imported!)
The only difference between methods 3 and 4 is
that method 3 will force a recalculation by the
XT(2)(3).
· Select the GPX file
· Click on Send to, Select the tab Send to
Device, if not automatically done.
· Tick Stripped routes (.gpx) for method 3, or
Complete routes (.gpx) for method 4.
A file should appear on the Zumo on the GPX
preset.
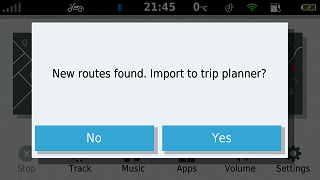
· When the XT(2)(3) is restarted it should notify you ‘New
routes found.’ Click Yes.
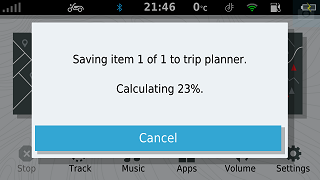
· Tick the Route(s) to import.
‘Saving item x of y to trip planner’
appears.
The trip should be listed in the Trip Planner.
(Under Imported!)
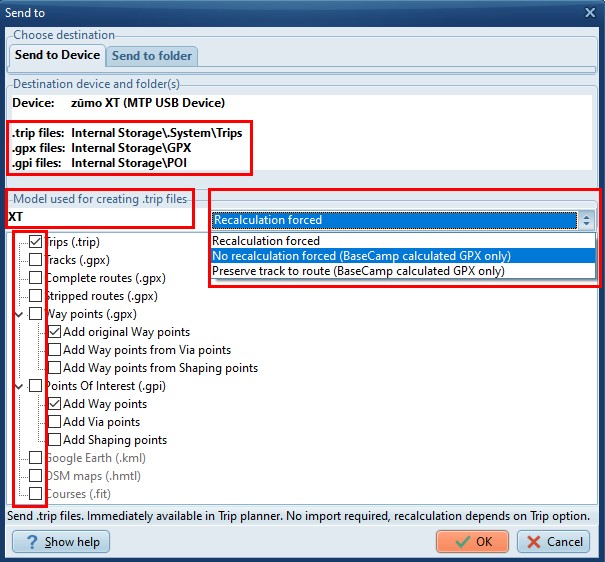
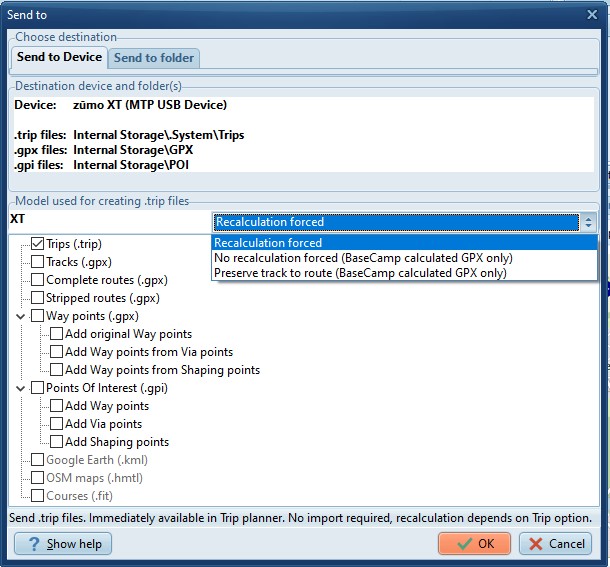
· Select the GPX file.
· Click on Send to, Select the tab Send to
Device, if not automatically done.
· Tick Trips (.trip)
· Verify the selected model matches your device.
· Select how the trip should be saved.
· Recalculation forced.
· No
recalculation forced.
· Preserve track to route.
· Click on OK
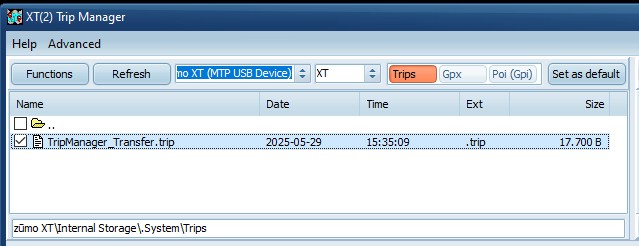
A file should appear on the Zumo on the Trips
preset. Note that the file name = trip name, and not a 10 digit
number.
· When the XT(2)(3) is restarted it will not prompt
you.
· The
trip is available in the Trip Planner without the need to
import.
· The
trip is listed under ‘Saved’.
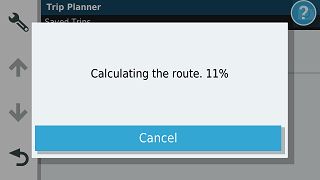
· Opening the trip for the 1st time will recalculate it, if
that option has been selected.
· Starting with TripManager V1.7 a dialog pops up allowing
you to select the routes to create trips for.