Automatic Compare
Version V1.5 of TripManager features an
automatic compare of a trip with the original GPX route. The
manual compare is still available of course. (See the
bottom of this
document)
A short explanation how the compare
works.
Background:
UDBdir’s are sub items of mAllroutes and are
the result of the calculation on the Zumo, and define the trip
(route) exactly. They contain the GPS coordinates, and the Map
Segment + Road ID. The compare works by checking for every
UDBdir if the GPS Coordinates (or Point Location) can be found
in the original GPX. If the GPX was calculated by BaseCamp the
check can even be done on Map Segment + Road ID.
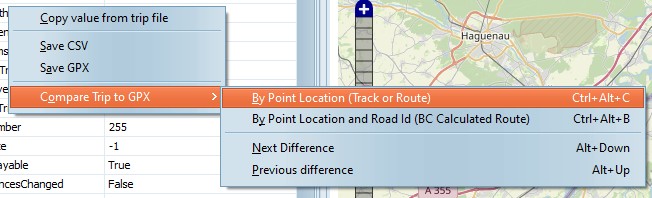
· By
Point Location (Track or Route)
This compare takes all the UDBdir records and
tries to find them as <trkpt>. This check will work for
tracks, but also for routes. In that case TM will use the
<gpxx:rpt> as <trkpt> and just ignore the Map
Segment + Road Id in the subclass.
To improve speed TM will first look up the track points of the
previous and next route point and use those track points as a
range. Think of it as the range of track points between 2
via/shaping points.
· By
Point Location and Road Id (BC Calculated Route)
This compare will only work for a BC
calculated route. First it tries to match the UDBDir type 3
records (Via/Shaping points in a trip) with the <rtept>
tags (Via/Shaping points in a GPX). For every type 3 there
should be a matching <rtept>. Next it checks the Name and
distance in GPS coordinates. If it finds a difference a line is
added with the distance between the points in meters.
For all other UDBdir’s there should be a
corresponding <gpxx:rpt> with a <subclass>. They
are checked for Map Segment + Road ID and
distance.
Note: if the subclass is different, but the
distance is 0 it could be the case of a route point on a
junction.
In the settings you can specify the allowed
distance. (500 meters default)
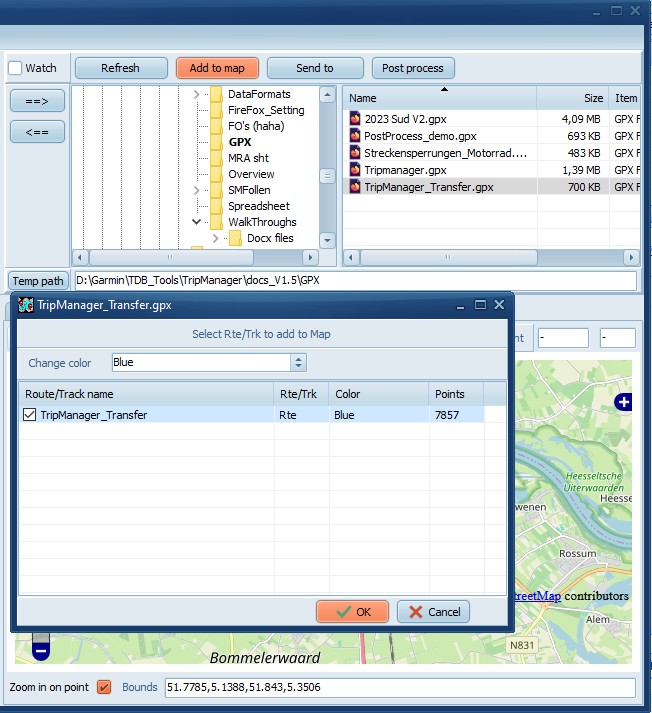
· Select a .trip file. This can be a .trip file on the
Device or on a Windows Folder.
· Right click on the Grid and select the Compare method. Or
use CTRL+ALT+C/CTRL+ALT+B
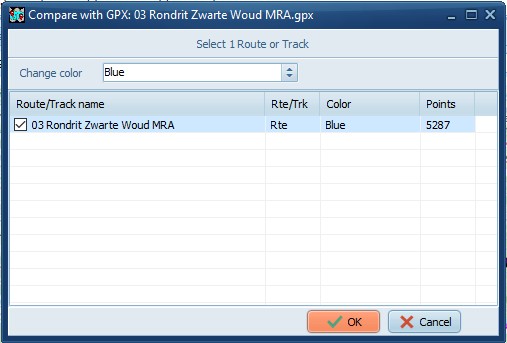
· Select the GPX file, and the Route/Track in that GPX
file.
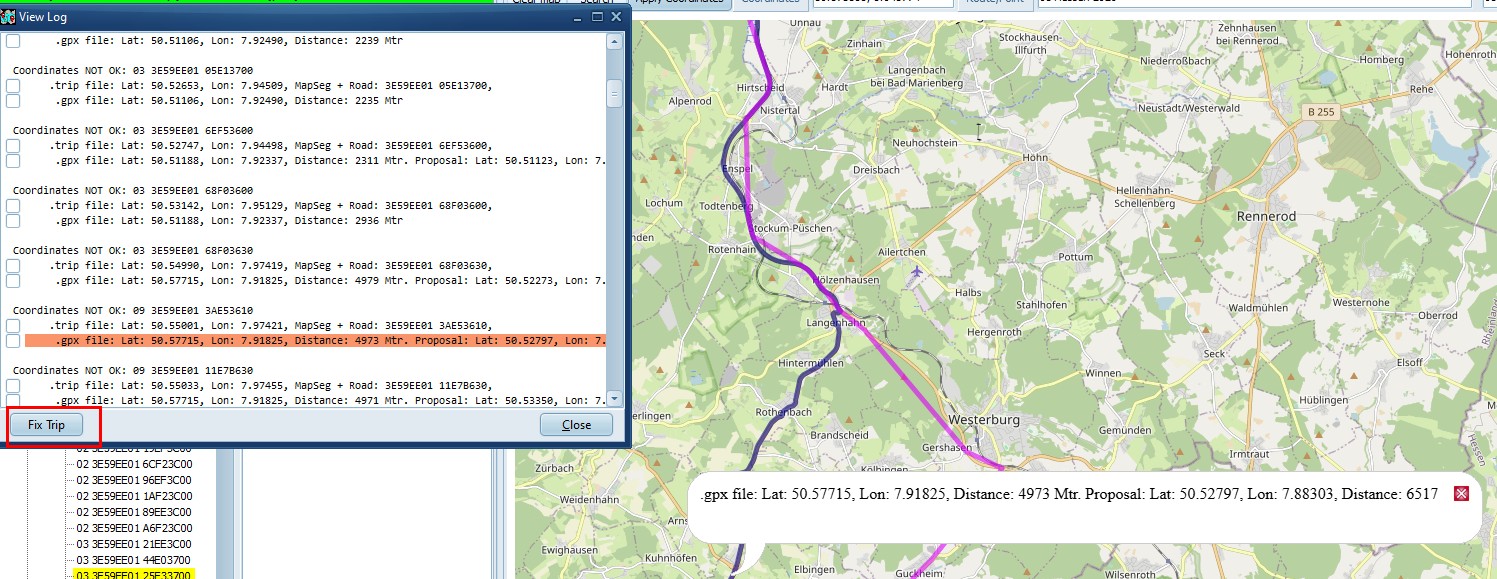
· A
log window will be displayed with the results. The results are
also copied to the clipboard.
· The
selected route/track to compare with will also be shown on the
map.
· Clicking on a line of the log window will mark that on the
map.
· The
items in error will be marked with a different background color
on the treeview.
· Use
ALT+Cursor Down/ALT+Cursor Up to find the differences in the
Treeview.
In the compare window the difference lines
have checkboxes that you can tick individually. Using
Ctrl/Click on the map + Apply Coordinates you can adjust the
GPS location to your choice.
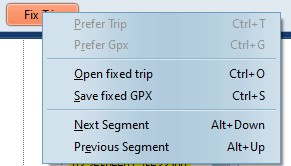
When a segment line is selected you can click
on 'Prefer Gpx' to have TripManager automatically tick the
checkboxes.
All ticked lines will become additional
shaping points when you click on Open fixed trip, or
Save fixed GPX.
· General
· 'Can not find mAllRoutes in trip.'
· 'Trip does not appear to be calculated.'
The trip can not be used for compare.
· ‘Route point NOT OK'
The route points in the trip dont match the
route points in the GPX. The name or the GPS coordinates could
be different.
· By
Point Location (Track or Route)
· 'Coordinates NOT OK'
The coordinates of the trip can not be found
in the GPX.
· 'No <trkpt> in GPX.'
The GPX has no <trkpt> at all, so can
not be used.
· By
Point Location and Road Id (BC Calculated Route)
· 'Number of route points does not match in trip and gpx
route.'
The GPX route does not match the trip.
· 'No <rte> in GPX.'
· 'No <rtept> in GPX.'
· 'No <gpxx:rpt> in GPX file. Non BaseCamp
origin?'
Probably not a valid route, or not calculated
by BaseCamp.
· ‘No matching RtePt found for: %s MapSeg + Road:%s, Lat:%s,
Lon:%s'
Indicates programming error. Should not
occur.
'Road NOT OK'
The subclass does not match. A mismatch in
Road-Id's
· 'Road OK, Coordinates NOT OK'
The subclass matches, but the coordinates
don’t.
It is assumed that you have already loaded
your trips on the Zumo, using one of the methods described
in 6 Send to device.
The next steps show how you can check the
result at your desk on the big screen of your computer.
· Connect your XT(2)(3), and wait for it to appear in the
Explorer.
· Start TripManager.
· Navigate, in the top-right panel, to the folder containing
the GPX
· Select the GPX file (Top-right) and click on Add to
map. Choose a color different from the trip color.
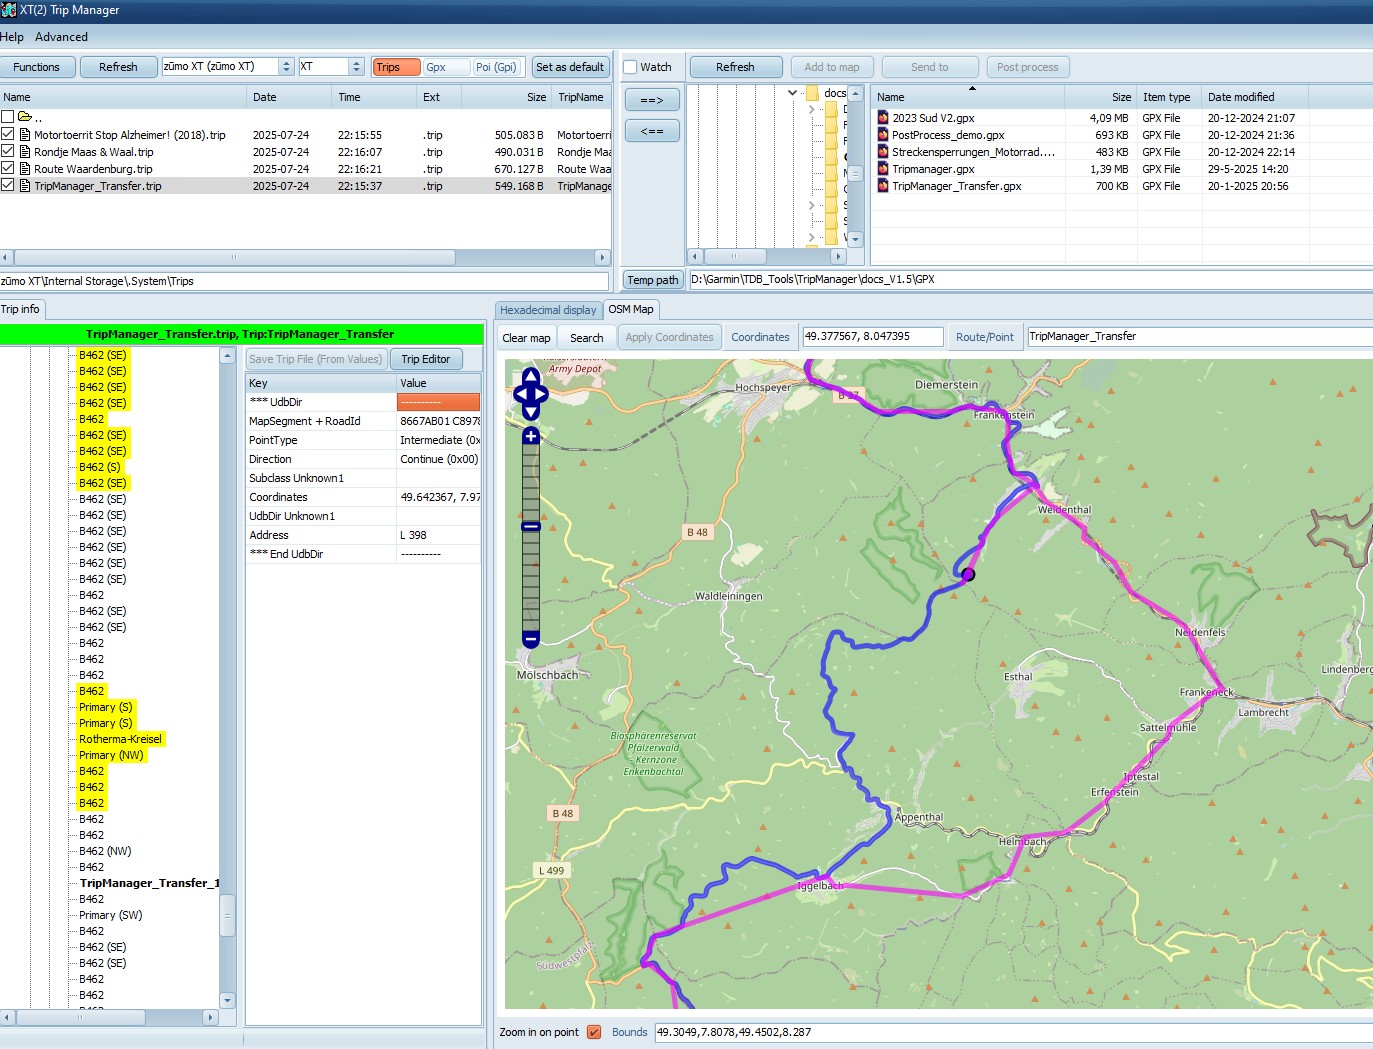
· Click on the trip (Top-left). The trip will be shown in
the default trip color. That can be changed in
Advanced/Settings, Tab General.
· You
can now compare the lines. Blue, chosen in the screenshot, is
the original track, Magenta is the trip on the XT(2)(3).
· If
the XT(2)(3) has made some choices you don’t like, add more
shaping points in Basecamp and repeat the procedure.