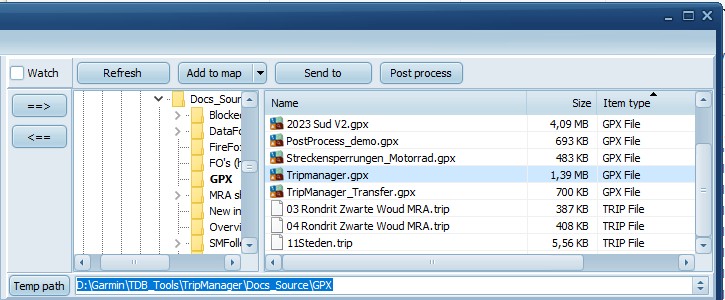
This tries to mimic the look of the Windows
Explorer. But is limited of course. It only shows certain file
types. GPX, TRIP, GPI, KML and HTML.
Tips for use:
· Use
CTRL+A to select all files.
· Right clicking a file shows a context menu. Where you can
delete/rename files.
· Clicking on the column heading sorts the files.
· You
can ‘drag and drop’ from Windows Explorer to this window. If a
directory is dropped it will open that directory. If a file is
dropped, the Post process dialog pops up.
· The
column widths and sorting are saved and restored the next
startup.
Note: It is possible to navigate to the (zūmo)
device and list its files. But this is not its intended use.
Keep the (zūmo) device files on the left, and Windows files on
the right!
Buttons available:
|
==>
|
Transfers selected files from the (zūmo)
device to the (Windows) directory.
|
|
<==
|
Transfers selected files from the
(Windows) directory to the (zūmo) device. No logic is
performed. But you may see warnings if files already
exist, or the file type is considered unsafe.
|
|
Temp path
|
To perform the functions on .trip files,
show the OSM map, and for Sending to device, files are
written to a temporary path. This button opens the Temp
path used in a new window
|
|
Refresh
|
Obvious.
|
Buttons available only when one or more GPX
files are selected:
|
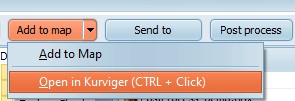
Add to Map
|
Shows the selected GPX on the OSM map
(Bottom right) A dialog is shown where you can select the
route/track from the GPX file, and change the color on
the map.
Using the small dropdown arrow, you can
open a GPX, or Trip file, in Kurviger
|
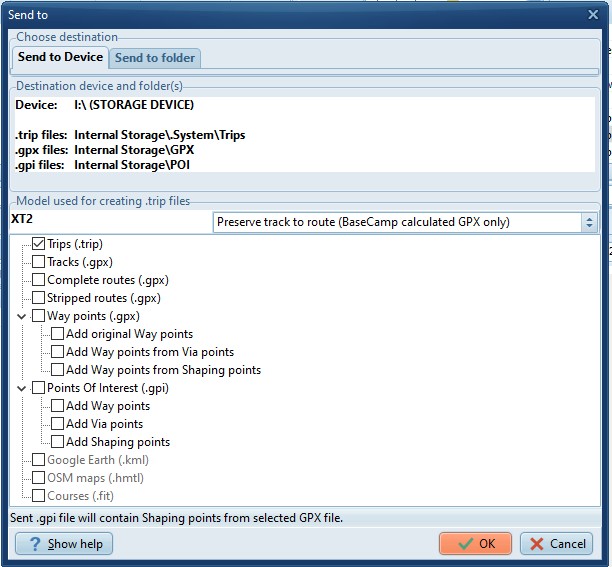
Send to
This button sends the file to either the
device, or a Windows folder.
Send to takes one or more selected GPX
files, converts them to the desired format, depending on the
check marks ticked, and sends them either to the connected
device, or a sub folder on Windows.
Use Send to device to transfer your
routes/waypoints to your device. Send to Folder creates
the same files, but saves them on a Windows Folder.
The GPX file should contain one or more
calculated routes, or Waypoints (BaseCamp, Kurviger and MRA GPX
V1.1 are tested)
Notes:
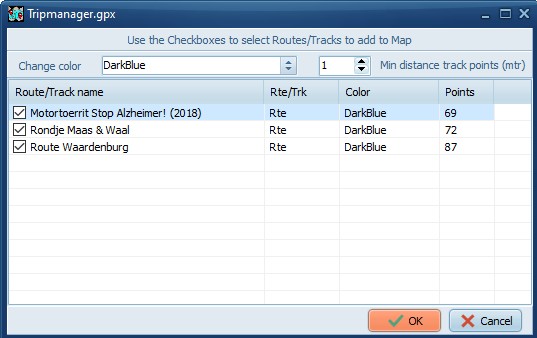
· If
tracks need to be created, the ‘Select from GPX’ dialog pops
up, where you can select the Routes/Tracks and the color they
should get.
· You
can reduce the number of track points in the created tracks, by
entering a value in Advanced Settings for
'MinDistTrackPoints'.
· In
the middle section the locations are shown where the files will
stored on the device. The selected model (XT, XT2, XT3, Tread 2
etc.) is shown on the line ‘Model used for creating .trip
files’.
· You
can change the default model and directories on the main
screen. For example if you want to store GPX files on the
SDCard and not on the internal storage.
· Not
available for Send to Device: .kml and .html
· Not
available for Send to Folder: Complete routes.
· Experimental support for FIT files has been added, as used
for example by Garmin Edge models. Not covered
here.
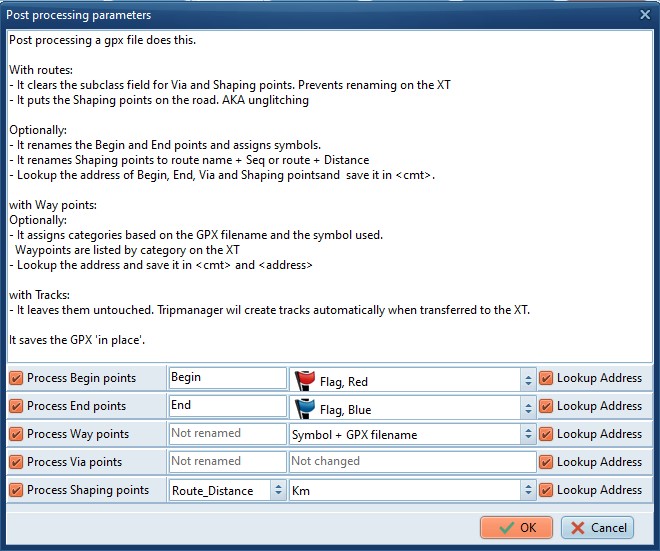
Post process
Not required, but can be helpful. Post
processing can perform various functions on the GPX file.
Typically you create a GPX file by exporting from Basecamp, MRA
(GPX 1.1 Route + track) or Kurviger. Use this function to
process the GPX file before you transfer it to the device. It
is recommended to import the file back in Basecamp to see what
has changed.
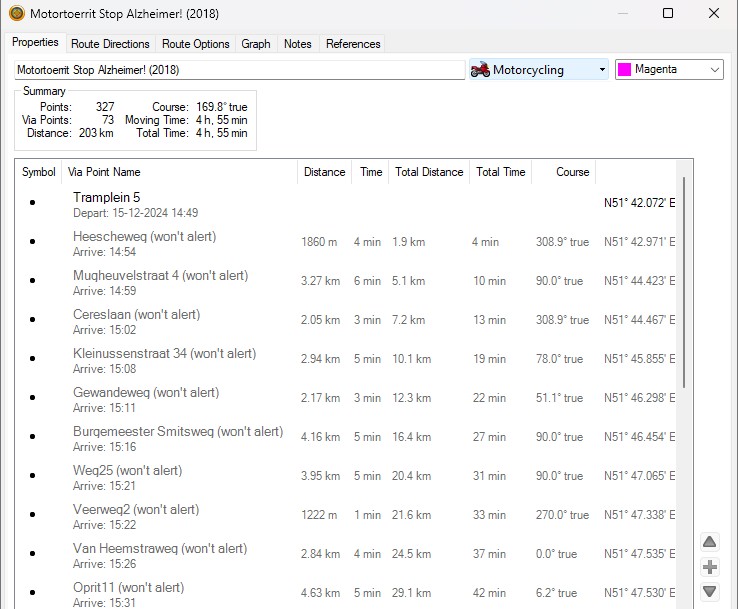
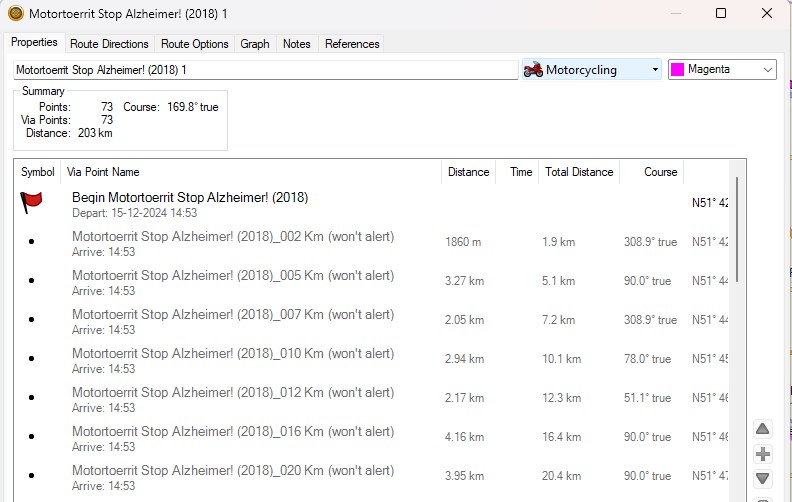
Post processing example: